How to Crochet Sunflower Melon Seed
Copyright and Attribution
At uaiamigurumi.com, we respect and value the work of content creators. This post features a detailed tutorial on the sunflower crochet pattern, specifically focusing on how to crochet a sunflower melon seed. Perfect for intermediate crocheters, this sunflower crochet pattern tutorial provides essential details about the flower project, allowing crocheters to follow along and create beautiful designs. With this sunflower crochet pattern, you’ll be able to craft intricate and vibrant sunflower designs that showcase your skills and creativity. Dive into the world of crochet with our sunflower crochet pattern and let your artistic talents shine. The pattern is sourced from Hookok.
Materials Needed:
- Yarn: Yarn of 3 colors – pink, khaki, and green
- Hook: 3 mm or 2.5 mm
- Flower Rod: 16 inches long x 0.08 inches diameter (40cm x 2mm)
- Iron Wire: 6 inches long x 0.02 inches diameter (15cm x 0.4mm)
- Hot Melt Adhesive
- Stitch Marker
- Scissors
Difficulty: Middle
Gauge: Not applicable. Changing the hook size and yarn will change the size of the projects.
Stitches and Abbreviations:
- Double crochet – dc
- Double crochet two stitches together – dc2tog
- Front post double crochet – fpdc
- Half double crochet – hdc
- Single crochet – sc
- Slip stitch – ss
Special Stitches:
- Picot stitch – single crochet in the next stitch, chain two, slip stitch at the base of the same stitch.
Pattern Notes:
- The pattern is in US terminology.
- The rows are worked in a round.
- Additional notes are indicated in italics.
Step-by-Step Patterns:
Stamen:
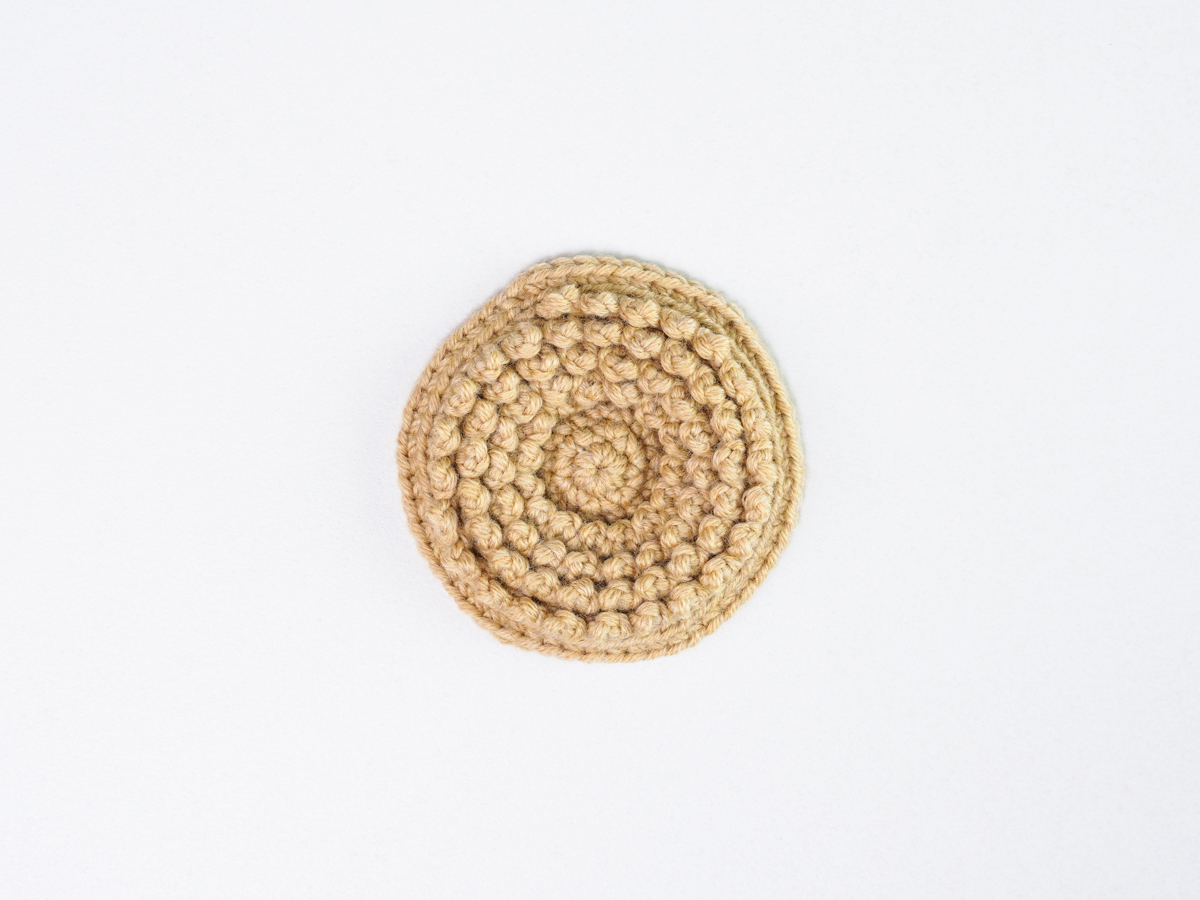
- Start with a magic ring.
- R1: Work 6 sc into the magic ring, 1 ss, 1 ch. [6]
- R2: (2 sc in next st) *6 times, 1 ss, 1 ch. [12]
- R3: (1 sc, 2 sc in next st) *6 times, 1 ss, 1 ch. [18]
- R4: (1 sc, 2 sc in next st, 1 sc) *6 times, 1 ss, 1 ch. [24]
- R5: (3 sc, 2 sc in next st) *6 times, 1 ss, 1 ch. [30] Place a stitch marker and keep it here.
- R6: (2 blosc, 2 blosc in next st, 2 blosc)*6 times, 1 ss, 1 ch. [36]
- R7: (5 blosc, 2 blosc in next st) *6 times, 1 ss, 1 ch. [42]
- R8: (3 blosc, 2 blosc in next st, 3 blosc)*6 times, 1 ss, 1 ch. [48]
- R9: (7 blosc, 2 blosc in next st)*6 times, 1 ss, 1 ch. [54]
- R10: Work 54 blo sc, 1 ss, 1 ch, cut and leave a tail. [54]
Seeds:
- Go back to R5, where you placed a stitch marker. Working in front loops of stamen only.
- R5: (3 ch, 1 ss at the base of the ch, sk 1, 1 ss into the next st) till end of row, 1 ss in next row.
- R6 – R8: Repeat R5 (Place a stitch marker and keep it here), work 1 ch, cut and leave a tail.
Flower Sepal:
- Start with a magic ring.
- R1: Work 6 sc into the magic ring, 1 ss, 1 ch. [6]
- R2 – R3: 6 sc in each round, 1 ss, 1 ch. [6]
- R4: (2 sc in next st)* 6 times, 1 ss, 1 ch. [12]
- R5: (1 sc, 2 sc in next st)* 6 times, 1 ss, 1 ch. [18]
- R6: (1 sc, 2 sc in next st, 1 sc)*6 times, 1 ss, 1 ch. [24]
- R7: (3 sc, 2 sc in next st)* 6 times, 1 ss, 1 ch. [30]
- R8: (2 sc, 2 sc in next st, 2 sc)*6 times, 1 ss, 1 ch. [36]
- R9: (5 sc, 2 sc in next st) 6 times, 1 ss, 1 ch. [42]
- R10: (3 sc, 2 sc in next st, 3 sc)* 6 times, 1 ss, 1 ch. [48]
- R11: (7 sc, 2 sc in next st)*6 times, 1 ss, 1 ch. [54]
- R12: Working in front loops only: {1 ch, sk 1, (in the same st: 2 flodc in one st, 3 ch picot st, 2 flodc in same st); 1 ch, sk 1, 1 floss} * 13 times, 1 ss, 1 ch, cut and leave a tail. A total of 13 sepals.

18x Small Petals:
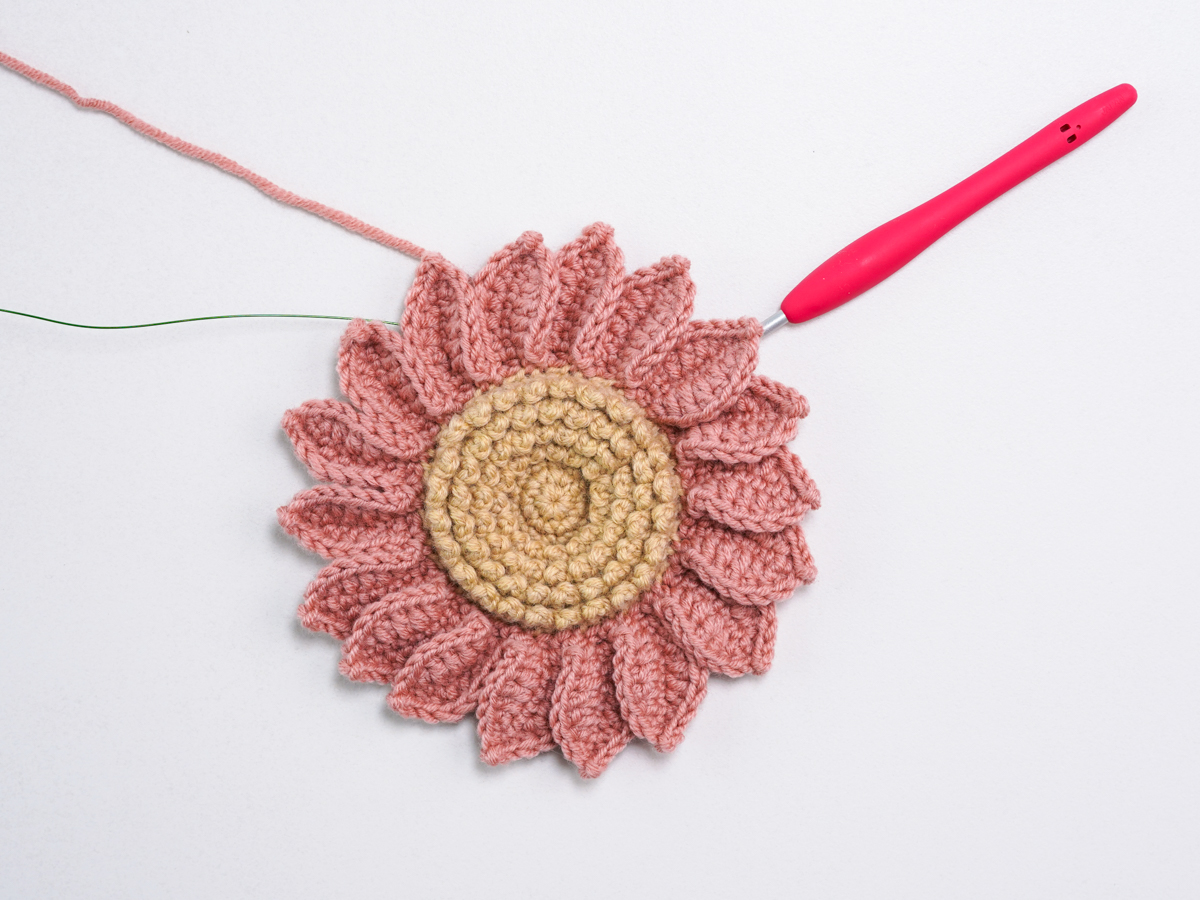
- Go to where you placed the stitch marker on R9 of the stamen and join the yarn. Working in front loops only.
- R9: (8 ch, start the 2nd chain from hook, 7 sc, sk 1, 2 ss) *18 times, 1 ss, 1 ch.
Edging of Petals:
- Add iron wire, {1 sc, 1 hdc, 3 dc, 1 hdc, 1 sc, (in the same st: 1 sc, 1 ch picot st, 1 sc); 1 hdc, 3 dc, 1 hdc, 1 sc, sk 1, 1 ss }*18 times, 1 ss,1 ch, cut and leave a tail. A total of 18 petals. Hide the tail with a darning needle, twist the wire tightly and hide.

18 Big Petals:
- Go to where you placed the stitch marker on R10 of the stamen and join the yarn. Working in front loops only.
- R10: (10 ch, start the 2nd chain from hook, 9 sc, sk 1, 2 ss) *18 times, 1 ss, 1 ch.
Edging of Petals:
- Add iron wire, {1 sc, 1 hdc, 5 dc, 1 hdc, 1 sc, (in the same st: 1 sc, 1 ch picot st, 1 sc); 1 hdc, 5 dc, 1 hdc, 1 sc, sk 1, 1 ss }*18 times, 1 ss,1 ch, cut and leave a tail. A total of 18 petals. Hide the tail with a darning needle, twist the wire tightly and hide.

Leaf:
- Start with foundation chain: 21 ch.
- R1: Add iron wire, start the 4th chain from hook, 2 tr in next st, 8 tr, 3 dc, 3 hdc, 2 sc, 3 sc in last st; (do not turn, working on the other side); 2 sc, 3 hdc, 3 dc, 8 tr, 2 tr in next st, 3 ch, 1 ss on bottom of 1st ch.
- R2: 3 ch, (in the same st: 1 sc, 1 hdc); (in the same st:1 dc, 1 tr); 8 tr, 4 dc, 3 hdc, 2 sc, 3 sc in last st; (do not turn, working on the other side); 2 sc, 3 hdc, 4 dc, 8 tr, (in the same st: 1 tr, 1 dc); (in the same st: 1 hdc, 1 sc); 3 ch, 1 ss at base of ch 3.
- R3: 3 ch, 2 sc in next st, 2 hdc in next st, 2 dc in next st, 9 dc, 5 hdc, 5 sc, (in the same st: 2 sc, 2 ch picot st, 1 sc); 5 sc, 5 hdc, 9 dc, 2 dc in next st, 2 hdc in next st, 2 sc in next st, 3 ch, 1 ss at the base of 1st ch. Cut and leave a tail to wrapping.
Assembly:

- Bend one end of the stem and insert it into the middle of the flower sepals.
- In the same steps, bend two flower stems and glue them on the sepals with hot melt adhesive.
- Use the yarn of the same color as the sepals to sew with the stamen, leave an opening before the sewing ends, add fiberfill, and then sew the rest.
- Use a green yarn and wrap the stem, add the leaf.
- Continue wrap to the end, cut the tail and secure with hot melt adhesive.
Notes:
- To add the wire, insert your hook under the wire and crochet over it.
- Video subtitles need to be turned on by yourself in the settings.
Subscribe to uaiamigurumi! Get updates on the latest posts and more from uaiamigurumi straight to your inbox. I agree to my personal data being used for interest-based advertising as outlined in the Privacy Notice. Subscribe


