How to Crochet Tulip Flower
Copyright and Attribution
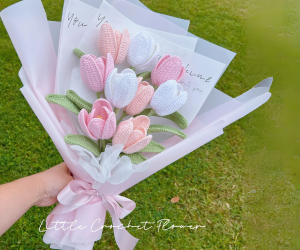
At uaiamigurumi, we respect and value the work of content creators. This post features a detailed tutorial on crochet Tulip flowers, perfect for beginners and intermediates. With this crochet Tulip flowers tutorial, you’ll find important details about the flower project, designed for crocheters to follow along and create stunning designs. This post features a detailed tutorial on how to crochet tulip flower from the Hookok,
Equipment Needed:
- Hook: 2/2.5mm
- Stitch markers
- Scissors
Ingredients:
- Yarn: Lace or fingering yarn (any four colors)
- Flower rod: 40cm long x 2mm diameter (16 x .87 inches)
- Iron wire: 15 cm long x 0.4mm diameter (6 x 0.02 inches)

Step-by-Step Guide to Your Crochet Hookok Pattern:
Small Petal (Make 3):
- Start with the foundation chain: ch13
- R1: Starting with the second chain from the hook, crochet 1 sc, 1 hdc, 7 dc, 1 hdc, 1 sc; 3sc in the last st; (working on the other side of the ch) 1 sc, 1 hdc, 7 dc, 1 hdc, 1 sc, 1 ss, and 1 ch.

- R2: Add iron wire. Work 12 sc, 3sc in the last st; (working on the other side of the leaf), 11 sc, 2 sc in next st. Cut and leave a tail for sewing.

Large Petal (Make 3):
- Start with the foundation chain: ch13
- R1: Starting with the second chain from the hook, crochet 11 sc, 3sc in the last st; (working on the other side of the ch), sc10, 2 sc in next st, 1 ss, and 1 ch.
- R2: 2 sc in the next st, 1 hdc, 8 dc, 1 hdc, 1 sc, 3 sc in the last st; (working on the other side of the ch), 1 sc, 1 hdc, 8 dc, 1 hdc, 2 sc, 1 ss, and 1 ch.
- R3: Add iron wire. Work 14 sc, 3sc in the last st; 13 sc, 2sc in next st, 1 ss, cut and leave a tail to sew.
Tulip Leaf:
- Start with the foundation chain: ch30
- R1: (Add iron wire), starting with the second chain from the hook, crochet 2 sc, 3 hdc, 18 dc, 3 hdc, 2 sc, 3 sc in the last st (working on the other side of the ch) 2 sc, 3 hdc, 18 dc, 3 hdc, 2 sc, 1 ss.

Tulip Stamen (Make 6):
- Wrap yarn around the center of the iron wire, fold, and then twist (refer to the video tutorial and photos).

Assembly:
- Place the stamen, then align the first petal.
- Place the two petals around the first petal and stamen, and sew and join to the rod by wrapping the double yarn.
- Continue wrapping, placing the leaf a few along the way.


Notes:
- To add the wire, insert your hook under the wire and crochet over it.
Subscribe to uaiamigurumi! Get updates on the latest posts and more from uaiamigurumi straight to your inbox. I agree to my personal data being used for interest-based advertising as outlined in the Privacy Notice. Subscribe
Explore More Free Patterns:
Looking for more crochet inspiration? Visit our Free Patterns Page to discover a wide variety of crochet designs. Whether you’re a beginner or an advanced crocheter, you’ll find patterns that suit your skill level and spark your creativity. Dive into our collection and start crafting your next masterpiece today!